Showing posts with label favorite. Show all posts

Sushi is Bae Nail Art

Sushi nail art by @chalkboardnails

Sushi is Bae Nail Art  || I love sushi and so does most of the rest of the world. It's fresh and delicious and actually gorgeous. Have you SEEN the color of raw tuna? I want to paint my LIFE in it!

Anyway, as with most things I love, I decided to try to put it on my nails. Because, naturally. I've seen a lot of gorgeous interpretations of sushi nails lately, but I did try to make mine "my own."

Sushi nail art by @chalkboardnails

On my thumb, I put my bae tuna. My pointer is tamagoyaki, which honestly I chose more for it's color than anything -- I have only eaten it once! My middle finger is salmon, my ring finger is rice, and my pinkie is intended to look like avocado with sesame seeds.

Quick sidebar about the rice nail that might give you some insight into my brain: in hindsight, if I were to do this all over again, I would paint individual white grains of rice over a negative space clear nail. I think that would read more like rice and look cooler than what I attempted here. The grey patterning is hard to read.

Sushi nail art by @chalkboardnails

I used gel polish for this, but won't be able to list out all of the materials I used. I did a lot of color mixing, layering, and blending, and beyond that, I wore this manicure a month or two ago and I don't remember the specifics. Oops! 😇

Are you a sushi fan? What's your favorite thing to order?

Simple Constellation Nail Art

Constellation Nail Art by @chalkboardnails

Simple Constellation Nail Art || I was due for a fresh set of gel polish this week, and have been craving black and white lately. I don't usually gravitate towards dark nail colors, because I feel like they make my nails look small and (sometimes) weird. #truenailconfessions. BUT, I've been seeing black and white nails all over my feed lately, and it had me wanting it on my own fingers.

Constellation Nail Art by @chalkboardnails

Since I try to ride out these gel polish sets as long as possible, I can't slack on the nail art for my right hand. I figured constellations would be easy enough that I could pull off something passable using my left hand.

I started with two coats of my new favorite black gel polish, Presto #060 Minaccioso. Next, I used Wildflower's Art Paints in Powder to paint on constellations and stars. Then, I used two coats of gel topcoat to seal the paint details in. Easy peasy!

Constellation Nail Art by @chalkboardnails

P.S. They're all based on real constellations! I wanted to do my zodiac sign, but who knew Sagittarius had so many stars in it?!?!?

East Asia Meets The Southwest - Embellished Gel Nail Art

Southwest-inspired gel nail art by @chalkboardnails

I have been waiting for this day since the beginning of the challenge. Not only because it meant that I had successfully completed the gauntlet for the fifth (!!!) year in a row, but also because I had a manicure that I have been dying to recreate for a very long time.

This beauty of a manicure is completely inspired by 111NAIL salon in Japan. I love it SO much. I tried to copy it to the best of my ability (and materials) and I am beyond happy with the outcome. I just adore the aesthetic of Japanese nail art; it's always so refined and balanced.

Southwest-inspired gel nail art by @chalkboardnails

Since the challenge is now over, I decided to these in gel and on both hands so I can enjoy them for a while. Here are the products that I used:

Gelish - Hot Rod Red
Red Carpet Manicure - Sandal Scandal
Akzentz Gel Play in White and Black

Gold caviar beads
Triangle studs
Turquoise teardrop charm
Round gold frame

Akzentz Bling On (used to attach 3D embellishments)
Presto Top Gel (thick gel topcoat)
Gelish Foundation (go-to gel basecoat)

Southwest-inspired gel nail art by @chalkboardnails

These nails weren't hard to do at all; however, they were pretty time consuming.

The drag marble nails are my favorite part and are beyond easy, especially in gel. All you need to do is apply the colors in arced stripes, and then drag a clean striper brush through them to create the patterns. Cure the marbling in your lamp and you're set!

The other nails are basically just dots and embellishments, which I attached using Akzentz Bling On. It's a super strong, thick gel that grabs ahold of your charms or studs and helps keep them in place once cured. It made the process of placing the gold bits a lot easier, especially on a manicure like this with so many elements.

I made sure to finish with a thick gel topcoat to help smooth out the edges on the 3D pieces.

Southwest-inspired gel nail art by @chalkboardnails

If you have a moment, be sure to go give @111nail_omotesando a follow on Instagram, I have completely copied this manicure from them and there is so much more gorgeous work to be seen on that account.

Southwest-inspired gel nail art by @chalkboardnails

That's a wrap on the challenge for this year! Stay tuned for my 2015 roundup, and congratulations to those of you who have finished as well!

Previous nails I've honored:
  • Rebecca Likes Nails' Candy Print
  • Mr. Candiipants' Koi Fish
  • Nailside's Abstract 80's Design
  • Very Emily's Chunky Sweater Nails

Simple Vintage Floral Inspired by Lacquerstyle

Vintage floral nails by @chalkboardnails

We are nearing the end of the challenge! Today's prompt is "inspired by a tutorial" and I've taken inspiration from the talented (and Queen of Florals), Lacquerstyle. For this particular look, I've followed her Simple Abstract Floral Tutorial, which not only features a fun and easy design, but has gorgeous cinematography and photography to boot.

Vintage floral nails by @chalkboardnails

I wont detail how to do this look -- if you want to visit the tutorial, just click on the link above!

I used Formula X Cloud Nine as my base. The flowers are painted with China Glaze Make an Entrance, while the blue blossom sprays were done in China Glaze First Mate. I created the leaf shade by mixing China Glaze Take a Hike and American Apparel Crescent Heights.

I love this look, though mine aren't quite as perfect as Kristin's! The smaller blue sprays really add a lot to the completed manicure.

Vintage floral nails by @chalkboardnails

Check out the other tutorials I've tried in the past:
  • Cutie owl half moons
  • Candy mermaid scales
  • Floral pond manicure
  • Reverse stamped glow in the dark stars

Simple Vintage Floral Inspired by Lacquerstyle

Vintage floral nails by @chalkboardnails

We are nearing the end of the challenge! Today's prompt is "inspired by a tutorial" and I've taken inspiration from the talented (and Queen of Florals), Lacquerstyle. For this particular look, I've followed her Simple Abstract Floral Tutorial, which not only features a fun and easy design, but has gorgeous cinematography and photography to boot.

Vintage floral nails by @chalkboardnails

I wont detail how to do this look -- if you want to visit the tutorial, just click on the link above!

I used Formula X Cloud Nine as my base. The flowers are painted with China Glaze Make an Entrance, while the blue blossom sprays were done in China Glaze First Mate. I created the leaf shade by mixing China Glaze Take a Hike and American Apparel Crescent Heights.

I love this look, though mine aren't quite as perfect as Kristin's! The smaller blue sprays really add a lot to the completed manicure.

Vintage floral nails by @chalkboardnails

Check out the other tutorials I've tried in the past:
  • Cutie owl half moons
  • Candy mermaid scales
  • Floral pond manicure
  • Reverse stamped glow in the dark stars

Crop Circle Inspired Nail Art

Crop circle nail art by @chalkboardnails

"Inspired by the supernatural" is another one of the challenge prompts that I'm not usually too enthused about. I started out today attempting a manicure depicting the Galactic Entity from Futurama, but quickly changed my mind (looked too much like my galaxy nails!). I decided to do some crop circle nail art instead, and boy am I glad that I did! I'm super pleased with these and hope you enjoy them too.

Crop circle nail art by @chalkboardnails

I started out by applying two coats of Essie - Mojito Madness as my green base. Then, I used the dry brush technique to add some swipes of Duri - Shocking Twist. If you're unfamiliar, you just wipe most of the polish off of your brush, and then lightly swipe it over your nails.

Then, I used LVX - Avenal to handpaint my crop circle designs. Many of them have geometric elements to them, so I chose to focus on concentric circles as well as lines and triangles.

I finished the nail art with a matte topcoat. I liked the look of it glossy, but to be honest, the reflections of the lights that I use for my photos on my nails made my linework look distorted.

Crop circle nail art by @chalkboardnails

See more of my supernatural nail art:
  • Glow in the dark ghosties
  • Glittering Edward nail art
  • Phoenix feather nail art
  • Raava and Vaatu nail art (Legend of Korra)

Crop Circle Inspired Nail Art

Crop circle nail art by @chalkboardnails

"Inspired by the supernatural" is another one of the challenge prompts that I'm not usually too enthused about. I started out today attempting a manicure depicting the Galactic Entity from Futurama, but quickly changed my mind (looked too much like my galaxy nails!). I decided to do some crop circle nail art instead, and boy am I glad that I did! I'm super pleased with these and hope you enjoy them too.

Crop circle nail art by @chalkboardnails

I started out by applying two coats of Essie - Mojito Madness as my green base. Then, I used the dry brush technique to add some swipes of Duri - Shocking Twist. If you're unfamiliar, you just wipe most of the polish off of your brush, and then lightly swipe it over your nails.

Then, I used LVX - Avenal to handpaint my crop circle designs. Many of them have geometric elements to them, so I chose to focus on concentric circles as well as lines and triangles.

I finished the nail art with a matte topcoat. I liked the look of it glossy, but to be honest, the reflections of the lights that I use for my photos on my nails made my linework look distorted.

Crop circle nail art by @chalkboardnails

See more of my supernatural nail art:
  • Glow in the dark ghosties
  • Glittering Edward nail art
  • Phoenix feather nail art
  • Raava and Vaatu nail art (Legend of Korra)

Pinstripe and Damask Nail Art Inspired by Tory Burch

Tory Burch inspired nail art by @chalkboardnails

Ladies that are also attempting the challenge with me... Are you getting tired of this yet? I've hit my yearly breaking point, but as always, I will push through and prevail. Today's prompt is "inspired by fashion," and I've drawn inspiration from a Tory Burch look that was just shown off at New York Fashion Week.

I love these patterns and colors together, they're very textile-meets-Hamptons. Bold meets soft. Rigid meets organic.

Tory Burch inspired nail art by @chalkboardnails

I used Polish My Life - Saint as the base, and then mixed together Formula X - Glorious and LVX - Paraiso for the pinstripe color. I added the floral designs on with Formula X - Push the Limits and finished with topcoat.

Tory Burch inspired nail art by @chalkboardnails

Previously, on "Inspired by Fashion" day:
  • Max Azria spring look
  • Betsey Johnson bright gradient with "silly string"
  • McQueen textured skull scarf
  • Donna Karan inky negative space

Modern Romance Nail Art

Modern Romance nail art by @chalkboardnails

Modern Romance Nail Art || Today's challenge prompt is "inspired by a book." Unfortunately I'm not reading as much as I'd like, so my options were pretty limited, but I ended up finding inspiration in a book that I just started reading: comedian Aziz Ansari's Modern Romance. The book is all about dating in the modern age, and while I don't have much personal experience with that (longterm relationship and all, ya know?), I've certainly seen how it has affected my friends and peers!

With their experiences in mind, I decided to paint an ode to modern romance and, more specifically, the booty call.

Modern Romance nail art by @chalkboardnails

In my manicure, I included an Instagram "like" heart, the Tinder app icon, and (my favorite part), an iMessage booty call -- with someone in the middle of responding, of course. They are all handpainted and finished with matte topcoat.

I'm not very far into the book yet, but I've especially been enjoying all of the actual data they collected to back up the anecdotes. It's a super interesting read and funny, to boot.

Modern Romance nail art by @chalkboardnails

Previous literary manicures include:
  • Invisible Monsters by Chuck Palahniuk
  • The Missing Piece by Shel Silverstein
  • 1984 by George Orwell
  • The Wonderful Wizard of Oz by L. Frank Baum

You've Got a Friend In Me! - Toy Story Nail Art

Toy Story nail art by @chalkboardnails

Is there a better trilogy than Toy Story? Ok, there probably is (there are a lot of awesome trilogies!), but it's definitely an amazing one and probably the best animated trilogy at least. Today's 31DC prompt is "inspired by a movie" and in case it wasn't clear, I've done some nail art inspired by Woody and Buzz, the bestest friends ever!

Toy Story nail art by @chalkboardnails

These are handpainted using the following nail polishes...

Woody:
Formula X White Matter
Salon Perfect Oil Slick
Color Club Je Ne Sais Quoi
Deborah Lippmann Respect

Buzz:
Formula X White Matter
China Glaze Looking Bootiful
Formula X Pyrotechnic
Girly Bits It's Hoop to Be Square

Clouds:
Formula X Provocative
Formula X White Matter
Salon Perfect Oil Slick

Toy Story nail art by @chalkboardnails

I have done quite a few movie manicures in the past! Check out what I've done previously for the challenge:
  • Star Wars inspired nail art
  • Eye of Sauron nail art from the Lord of the Rings trilogy
  • Titan nail art from the movie Hercules
  • Anna-inspired Frozen nail art

Paint It Black

Paint It Black nail art by @chalkboardnails

For today's prompt, "inspired by a song," I decided to do some nail art inspired by The Rolling Stones' "Paint It Black." The song is about depression and loss, and wanting to paint everything black to match those feelings.

If you're familiar with the song, the obvious choice would have been do a red door and then put some black on it, but I wanted to go for something a little more colorful and (only slightly) less literal. I opted for a bright base, splattered and smeared with black paint.

Paint It Black nail art by @chalkboardnails

I began with a white base to help the colors above it pop.

Then I cut off a strip of a makeup sponge, and painted swipes of my three base colors directly on to the sponge. I used China Glaze Too Yacht to Handle, Nicole by OPI Hit the Lights, and Girly Bits Hip Hoop Hooray.

For the big black swipe, I wiped most of the polish off of the brush of Salon Perfect Oil Slick, and then dry brushed it across my nails. I used a small nail art brush to add the splatters and drips, then finished with topcoat.

Paint It Black nail art by @chalkboardnails

See how I've been inspired by songs in the past:
  • Tik Tok - Ke$ha
  • Diamonds Are a Girl's Best Friend
  • Lose Yourself to Dance - Daft Punk
  • Undone (The Sweater Song) - Weezer

Peachy Marbled Stone Nail Art

Peachy marbled stone nail art by @chalkboardnails

We're at the end of section two in the 31 Day Challenge! Today's prompt is "water marble," so basically I've been dreading it this whole time. I am not a good water marbler, I cannot create a marbling bullseye to save my life... BUT this time, I used that to my advantage! Instead of going for a super perfect and gorgeous water marble design, I opted for something a bit more organic with a marbled stone look. More room for error = happy Sarah.

Quick sidenote, does anyone know what kind of stone I created? Some pals suggested banded carnelian, agate, & jasper... But I can't shake the feeling that there's another one that I just can't put my finger on!

Peachy marbled stone nail art by @chalkboardnails

I started with a base of Presto #100 Trillo gel, a soft peachy nude. I've been wearing gel underneath all of my challenge manicures and this happens to be my base for this week!

Then, I dropped drops of white polish and a slow-drying clear topcoat onto the surface of a small dappen dish filled with room temperature water. I used a pinpoint dotting tool to gently stir up the drops until I had a pattern that I liked. Working one at a time (since my dish was so small), I dipped my nails into the swirled polish.

Look guys, I'm never gonna be a great watermarbling resource. Here's a good video for beginners from Hannah Rox Nails with some tips and tricks, if you're interested in learning!

Finally, I used a skill that I do have: freehanding! I added some orange and deep red banding along the white marbling using my tiny nail art brush.

The last step was to add a coat of sheer pink on top to give everything a deeper, buried look. I used Formula X Sheer Strength in Wonderous.

Peachy marbled stone nail art by @chalkboardnails

Previous water marble work:
  • Turquoise water marble
  • Starburst candy water marble
  • Soft flower marble
  • Tattered monochromatic spray marble

Wasabi and Caviar - An Exercise In Linework and Patience

Wasabi and Caviar by @chalkboardnails

Today is my birthday, and if you can believe it, my nails are actually naked right now! THE HORROR! I'm hoping to put something fun on them after I get home from work, but for now, I wanted to share a manicure I spent a lot of time on recently.

I am calling it wasabi and caviar for reasons that I hope are obvious! This entire design is handpainted with regular nail polish. It's some of my best linework to date, I think. Hooray for improvement there!

Wasabi and Caviar by @chalkboardnails

Nail polishes and products used:
LVX Midori
Formula X Dark Matter
Sally Hansen Stud Kit

If you want to attempt a design like this, I've got some tips!
  1. Get a small brush. I can't tell you how long I used a thicker nail art brush, cursing my lack of talent rather than the tool I was using. Once I got a thinner brush, it helped me immensely. I still had to keep practicing, but my old brush was definitely part of the problem. Trim down an old brush with cuticle nippers if you don't have a super thin one.
  2. Keep it clean. If you're using polish (instead of acrylic paint or gel), clean your brush frequently with 100% acetone and regularly put down more polish onto your palette. Polish dries quickly and can wreck your fine lines if it isn't the right consistency.
  3. Small mistakes aren't the end of the world. You can use a clean nail art brush dipped in acetone to gently "erase" small mistakes from your work; just be careful not to go too crazy or it will eat through your base color. In this case, I put a layer of topcoat between the wasabi shade and my black linework for extra protection.
  4. Be patient. This shit isn't fast. When you factor in my previous tips and the detail of the work, you just gotta know it's not going to be easy to bust it out in 45 minutes. I like to put on Netflix and take breaks every so often to stretch out.

Wasabi and Caviar by @chalkboardnails

I just love this kind of strange green color, and the thick blingy stud nail is just the right amount of "odd" to go with it.

The Chalkboard Nails Halloween Nail Art Rewind

Halloween Nail Art Ideas by @chalkboardnails

I've done my fair share of Halloween manicures over the years, for sure. It's fun to get into the spirit of the season with spooky nail art, and there are just so many ways to interpret the theme. Take a trip with me through the Chalkboard Nails Halloween nail art graveyard to visit with the ghosts of my favorite manicures past.

Delicate Glistening Spiderwebs by @chalkboardnails
Delicate Glistening Spiderwebs
Make your spiderwebs pop against a midnight black-to-navy gradient! A bit of glitter on the white web adds a touch of glam while still keeping the look clean.


Black Widow Nail Art by @chalkboardnails
Black Widow Nail Art Tutorial
Textured polish combines with a bright red creme for this arachnid nail art look. No freehanding required; all you need is striping tape! Stop by the full post for the how-to.


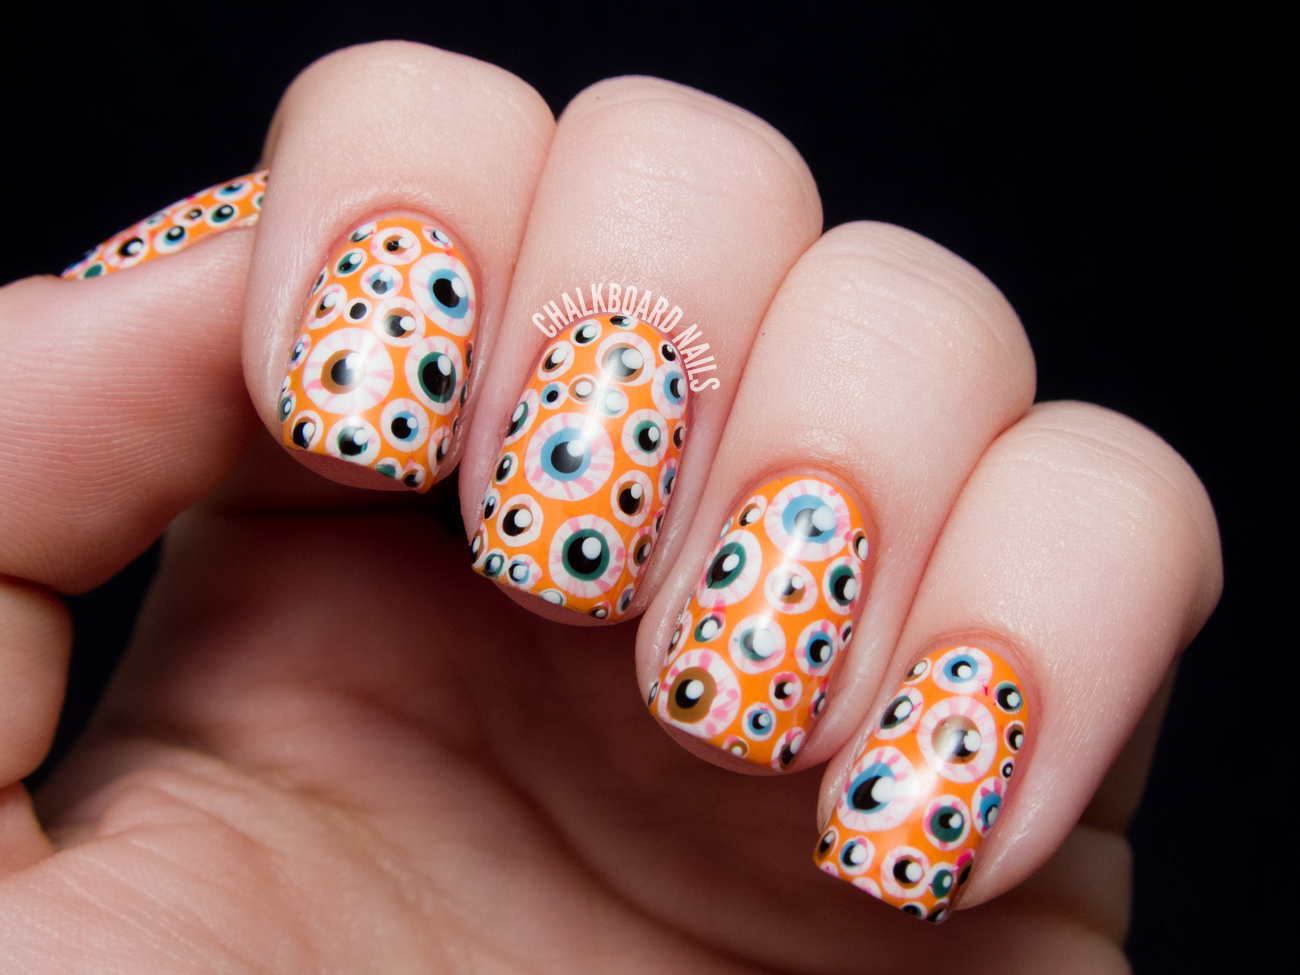
Halloween Eyeball Nail Art by @chalkboardnails
I'm Watching You...
I love me some eyeball nail art! This is my third eyeball look and by far the most Halloween-appropriate, but if you enjoy ocular patterns, be sure to also check out my 1984 manicure and my original Halloween eyeball pattern nails.


Spooky Splatter Nail Art by @chalkboardnails
Spooky Splatter Tutorial
This classic orange and black combo is a bit messy to create, but tons of fun and seasonally appropriate (without being TOO on-the-nose). I grabbed an orange jelly for my base and splattered black over the top, but any pairing of spooky colors would look awesome. Think purple, green, orange, and black.


Matte Brain Nail Art by @chalkboardnails
Brainssss...BRAINSSSS...
This abstracted, graffiti-esque design is zombie approved for maximum flavor. TIP: To achieve better results with your nail art pen, try putting down a matte topcoat first!


Midnight Smoke Nail Art Tutorial by @chalkboardnails
Midnight Smoke Nail Art Tutorial
This eerie manicure first made its debut during the 31 Day Challenge 2013, when I created the effect for black and white day. Recently, I created a tutorial for the look, and I think you'll be surprised by how easy it is to pull off. Perfect for the gal who wants to celebrate the season, but keep things classy.


Bones Mix and Match by @chalkboardnails
Chilled to the Bone
This is one of my oldest Halloween nail art posts (from way back in 2011!), but I think it holds up well! These mix and match bones are creepy-cute over a matte purple base.

Which one is your favorite? How do you like to celebrate the spookiest season on your nails?